Are you ready for a life changing experience? Are you prepared for one of the most alluring aromas of all ferments? Let your creativity flow. Koji can, and will, be your next muse. I urge everyone to invest a little time and resources into making koji; the real challenge is in the stopping. But after you try it, you won’t want to quit.
Instead, you may start by making koji using traditional ingredients such as rice and barley, only to find yourself experimenting with countless non-traditional seeds, legumes, and grains. Try it, I dare you.
To make koji is to grow mold. The mold we want is Aspergillus oryzae. This white and fuzzy mold transforms substrates such as grains or legumes into fruity aromatic deliciousness.
There are different ways to unlock sugars from starches. A common method in beer brewing is to malt grain. By sprouting the grains, the natural life-cycle of a seed unlocks the sugars so that the seedling can use those nutrients in the early stages of plant development. Tricking the seed into sprouting, and then halting that process, provides us with the sugar as opposed to the baby plant (yes, think of all those poor little newborn seedlings the next time you drink a beer).
Aspergillus oryzae uses a different method. There is no need to sprout when you are a microbe that can digest starch compounds and poop out sugars. That is not exactly what happens, but it works for a nice visual of the microbial process.
We can then use these sugars in other fermented foods such as miso or sake. But why be so old school and traditional when there is a whole new world of ingredients ripe for experimentation? This is a new age in koji love. Koji can be your new flavor weapon. Protect the world from the bland and the boring.
But first, you must make the koji. Here is a recipe excerpt from my new cookbook, The Everyday Fermentation Handbook. And here is a visual guide to building a koji incubator.
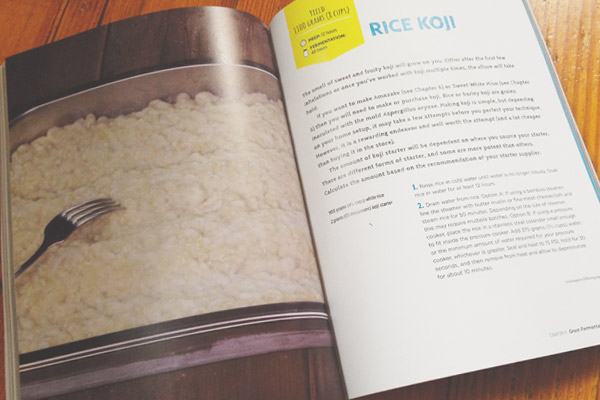
Yield: 1100 grams (8 cups) Prep: 12 hours Fermentation: 48 hours
Ingredients
- 900 grams (4.5 cups) white rice
- 2 grams (1.5 teaspoons) koji starter
Directions
- Rinse rice in cold water until water is no longer cloudy. Soak rice in water for at least 12 hours.
- Drain water from rice. Option A: If using a bamboo steamer, line the steamer with butter muslin or fine-mesh cheesecloth and steam rice for 50 minutes. Depending on the size of steamer, this may require multiple batches. Option B: If using a pressure cooker, place the rice in a stainless steel colander small enough to fit inside the pressure cooker. Add 375 grams (1.5 cups) water, or the minimum amount of water required for your pressure cooker, whichever is greater. Seal and heat to 15 PSI, hold for 30 seconds, and then remove from heat and allow to depressurize for about 10 minutes.
- Remove rice from steamer or pressure cooker and place in a glass cake pan. Once cool enough to touch, use very clean hands to stir and work out any clumps that have formed. Continue to stir until rice has cooled to 110°F (43°C).
- Add koji starter to rice and mix thoroughly for 5 minutes.
- Cover with a clean and damp cloth. Incubate at 86°F (30°C) for 6 hours. If possible, control your incubator's temperature based on the internal temperature of the rice by inserting the probe into the middle of the rice bed. If this is not possible, check the internal temperature with a thermometer every few hours to make certain it remains near 86°F (30°C).
- After the first 6 hours, stir rice and break up any clumps that have formed. Cover and return to incubator for another 6 hours.
- Stir rice again and if rice feels drier than before, re-dampen cloth, cover, and return to incubator for another 12 hours.
- Rice should smell faintly sweet. Stir rice one more time and then create 2-3 trenches or furrows in the rice bed. Only make the trenches halfway deep and do not expose the bottom of the cake pan. The goal is to create as much surface area as possible and decrease likelihood of overheating as the koji mold grows. Cover and incubate for 12 more hours, ensuring that the temperature remains near 86°F (30°C).
- Check rice and dampness of cloth. If necessary, lightly re-dampen the cloth. Rice should smell sweet and fragrant and have signs of a white fuzzy mold beginning to form. Cover and ferment for another 8-12 hours.
- Once a white mold has stretched across the rice bed, remove from incubator, break up the rice clumps, and bring to room temperature. Use rice koji immediately, refrigerate or freeze in a sealed container, or slowly dry for 1-2 days for longer-term storage. Refrigerated koji will keep for 2-4 weeks, dry koji for 3-6 months, and frozen koji for up to 1 year.
The amount of koji starter will be dependent on where you source your starter. There are different forms of starter, and some are more potent than others. Calculate the amount based on the recommendation of your starter supplier.
If you want to make a lot of koji, I recommend using a large 20 quart pressure cooker. I like to make 4 pounds at a time, and steaming 1 batch of rice in a pressure cooker saves a lot of time compared to multiple batches in a steamer.
 Listen Now