While it is becoming much easier to source a kombucha SCOBY either from an online retailer or locally from a friend, you can just as easily pick up a bottle of kombucha at the grocery store and grow your own SCOBY.
The true origins of kombucha and the mother culture are unknown. Somewhere along the lines of history a symbiotic colony of bacteria and yeast (SCOBY) formed to make a good tasting sweet and sour beverage. If you drink this stuff regularly, then you might as well start making it yourself.
Why do I need a SCOBY?
Without a SCOBY, you have no way to ferment kombucha. People ferment their own kombucha for many reasons. Saving a lot of money is a big motivator for some, while others seek experimentation with flavors not available commercially. More importantly, it is fun and easy to ferment it yourself.
The SCOBY is what initiates the fermentation process in sweet green or black tea (or any tea from the Camellia sinensis plant). The SCOBY is sometimes incorrectly referred to as a mushroom. It is a gelatinous-like disk that generally floats at the top of a jar of kombucha-in-the-making. The bacteria and yeast ferment on the sugar and tea until it is slightly sour and bubbly.
Why not just buy a SCOBY?
Kombucha starter cultures aren’t super expensive, but it is way more rewarding to watch the SCOBY grow. It starts out as just a bit of sludge in the bottom of a kombucha bottle and within one to three weeks you will have a grown-up SCOBY to call your own.
If this is your first time making kombucha, then you need to know it is going to take 7-15 days from start to finish to make the drink. So even though growing your own SCOBY adds more time to the process, it helps build the necessary patience for kombucha brewing.
Not patient or convinced?
I’ve tried to convince you how much easier it is to grow your own SCOBY, but if you’re not patient enough to wait a few weeks for your SCOBY to mature or you can’t find any real bottled kombucha locally, then at least purchase your SCOBY from a reputable source. I recommend the Kombucha Tea Starter from Cultures for Health. The SCOBY comes dehydrated with instructions on how to bring it “back to life.” It is worth noting that rehydration will take longer than growing your own. But if you do end up purchasing through the link above, you’ll be able to feel all warm and fuzzy knowing that every purchase kicks us back a few cents to help support this website.
But seriously, there is no need to buy a SCOBY. Just spend a few dollars on a bottle of kombucha and grow it yourself.
How to grow your own SCOBY
Supplies
- glass bowl (6 to 8" in diameter)
- 16oz bottle of brewed kombucha
- thin fabric or cheesecloth
- rubber band or string
Directions
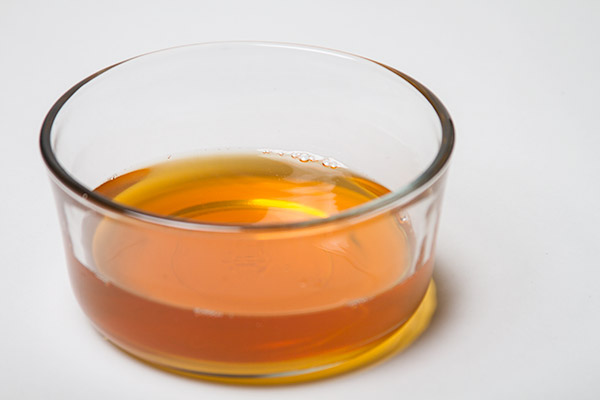
- Pour 16oz of store-bought kombucha into glass bowl.
- Cover bowl with fabric or cheesecloth.
- Secure fabric to bowl using rubber band or string.
- Store bowl in a dark place.
- Wait 1 to 3 weeks for kombucha SCOBY to form.
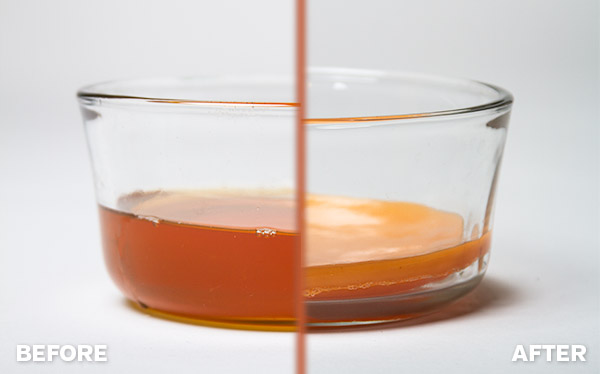
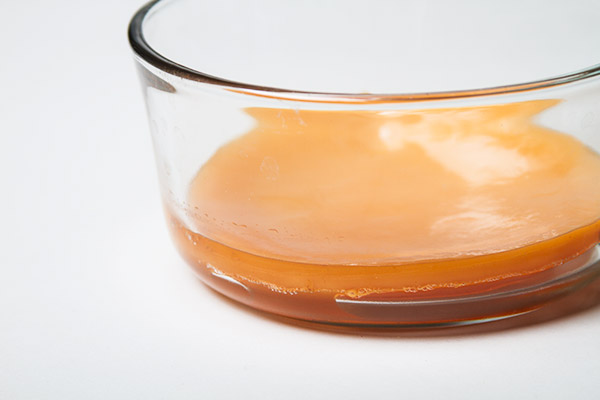
You will start to see a thin film forming on the bowl of kombucha after a few days to a week depending on ambient temperature. This film is the beginning stages of your new baby SCOBY.
Eventually, the yeast and bacteria in your new SCOBY will consume the sugars and absorb most of the original kombucha liquid. This will take anywhere from 1 to 3 weeks. If you keep a cold house in the winter, it is possible that this process will take even longer but I have not experienced this during a Wisconsin winter.
Once your SCOBY is 1/4 to 1/2” thick, you are ready to start a new batch of kombucha. Brew up some sugar tea and drop the new SCOBY in…and wait some more. Fermentation is a slow process but it is simple, easy and rewarding.
 Listen Now